191FS Trim Tabs Install

R

rrweather

Guest
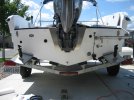
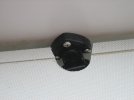
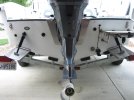
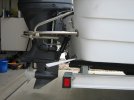
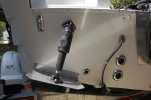
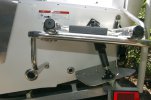
I finally ordered the trim tabs for my 191 yesterday. I had posted the question about trim tabs in another thread. I figured I would start a new thread with pictures of the installation when it begins. I went with the Bennett M80 tabs. The customer service reputation of Bennett is excellent. I ordered them from rivermarinesupply.com and they should be delivered on Thursday. As long as it doesn't rain this weekend, I'll start the installation on Friday or Saturday. I'll use this thread as an "installation thread" with pictures of the process. I'll update this thread again when I begin.
 
Finally got the trim tabs installed this weekend. I am in the process of uploading the pictures off of my camera on my other computer so I figured I'd post the installation details while that is going on.

I received the tabs on Thursday. River Marine Supply shipped them within a few hours of me placing my order. That's always nice. I started the installation on Friday afternoon. There was a window of opportunity where there was supposed to be no rain in the area. The instructions were pretty good. I read them a few times to make sure I understood everything before I began. I also bought plenty of beer in case things went sour.

The left tab is where I started. It took me about 30 minutes to mount it because I kept re-reading the instructions, then I would re-measure, then re-read, etc. Once I got the left tab mounted, the right one took less than 10 minutes since I knew what I was doing. With regards to the right side, the only thing I was unsure about was whether or not I was going to need to notch out my swim step to make room for the actuator. Once I got the tab mounted, I knew a notch was required. I attempted to make the notch with a hole-saw. It partially worked. I then had to use a jig saw to finish the notch, which required me removing the swim platform to do so. Once the notch was done I went to drill the holes for the actuator. The directions said to use the actuator template to mark the hole locations. For the life of me, I couldn't find the template in any of the packaging. It could have been there and maybe I missed it. Who knows. I ended up just making my own template out of thin cardboard. Once I had the template, the holes were easy to mark and drill per the instructions. The nice thing about roplene is the fact that you don't have to drill large pilot holes to get screws to go in. I kept all my holes small and the tight fit combined with the sealant should make a water tight fit. Once I got the actuators installed, I ran the tubing to the battery compartment, which is where I opted to install the pump. Up until this point, I had only spent about two hours getting to this step. I felt pretty good. The pump installation ended up being the most painful part of installation. The battery compartment is pretty tight and installing the bracket that holds the pump took longer than expected. It also was the part of the job that made me consume the most beer and let a few select words fly. Luckily there were no nuns or small children in my area. I finally got the pump bracket installed and the pump in place. I went to run the wires up to the console. When I installed my fishfinder, I re-ran a piece of string from the battery compartment to the console in case I ever needed to fish a wire through. In an effort to fish the pump wires and a new piece of string through to the console, my tape came loose and my string came out empty. After drinking some more beer, and letting the language fly again, I had to get creative in running the wires back in place. That was finally completed. At that point I was about 3 1/2 hours into the job. I decided on a mounting location for the switch and made some rough measurements to see if the stock wires were long enough to reach to where the switch would go. I think they would have been just long enough but it would have left very little slack in the wires, which would have made them more difficult to work with. I ran out of extra wire so a trip to the hardware store was in order. I decided at this point to break for the day (night) so I could eat a half-bloody steak and consume some more beer.

Day two started off frustrating. There were rain clouds all around me so I was racing against the weather. I went to solder the wires to the new wire I purchased the night before. My soldering iron decided to pick that moment to stop working. I then grabbed my butane torch, which also decided to not work. I didn't feel like towing the boat to the hardware store to buy a new soldering iron so I used some wire connectors I had in the garage. I would have preferred solder but the wires have no tension on them so I figure the connectors will hold up. The connections are also easy to get to in case I decide to solder them at a later time. I got the switch installed and wired everything up. Without thinking, I ran the 12V power line to the power distributuion block. I hit the swtich to test out the tabs. I heard the pump run and got a smile on my face. At about the time the smile formed, the pump stopped. The language continued from the day before but it was too early to start the beer (not to mention the fact that I still had a lot of stuff to do during the day that would have been harder to do with beer in my system). So after a minute of thought, I realized that I had beed stupid and plugged the power line (which contains a 20 amp fuse) to the power block (which had a 10 amp fuse installed). Sure enough, the power block fuse blew (like it's supposed to). So I rewired the power line and replaced the blown fuse and everything was good to go. I ran the tabs up and down a few times to purge the lines and all was good. I cleaned up the hydraulic lines in the battery compartment and put all my tools away. I ended up finishing about two hours before the rain started, which worked out nice. Total time was probably about 5 1/2 hours and a case of beer. If I were doing it again, I am sure I could shave at least an hour off of that. Unfortunately the weather isn't very nice so I need to wait to test them out. The sealant I had is the 7-day cure type anyway so I will need to wait a week before getting them wet.

Overall I am happy with the installation. As I mentioned, the hardest part was the pump, which was due more to the location I chose to mount it in. I am sure the performance will be much better as well so I would say it was worth the effort and money. I will try to post the pictures I have taken. I've never posted pictures here so hopefully I'll figure it out. Hope this helps anyone that is considering the job themselves.
 
Here are the pics. The first one is before. The second one is the tabs mounted. The third one is the swim platform notch. The last two are the finished installation. I realized that I forgot to take a picture of the switch installed. I'll do it next time I take the boat out. I had to resize the pictures to post them. If anyone wants full size pictures, I can e-mail them. Hope this helps.
 

Attachments

  • Before.jpg
    Before.jpg
    192.4 KB · Views: 124
  • Mounted.jpg
    Mounted.jpg
    199.2 KB · Views: 126
  • Swim.jpg
    Swim.jpg
    139.4 KB · Views: 119
  • Finish.jpg
    Finish.jpg
    183.3 KB · Views: 149
  • Finished2.jpg
    Finished2.jpg
    150 KB · Views: 128
I finally got the boat out to test out the trim tabs. Yesterday was beautiful here in NorCal. Went out fishing with some friends. It worked out well because my friends couldn't meet me at the dock until later in the day so it gave me some time to run the boat alone. The time to plane with the tabs is very quick. The speed I plane at has dropped considerably (hence the quicker plane times). I didn't get too hard core on my tests to see exactly what speed I plane at or how slow I could maintain plane at. I know the speed the boat planes at is probably around 14-17 knots, as opposed to the 24-27 knots before the tabs. It is nice being able to maintain plane at slower speeds when going balls-to-the-wall isn't appealing. Last night we were on our way back to the ramp and we maintained a nice smooth 22 knots with the boat trimmed perfectly. Once on plane, trimming the boat out is easy and makes a much smoother ride. I never paid much attention to the lateral position of the boat because there was no way to adjust for it. Now a quick click of trim balances everything out nicely. I am looking forward to taking the boat across the bay in a little chop to see how she handles. Overall, I am very happy with the trim tabs. While a little pricey, the improvement in perfomance and ride make them worth every penny. As long as you drink beer while installing them, the installation is almost enjoyable!

On a side note, we only caught 3 small catfish so running the tabs was the highlight of the day (besides sunshine and beer).
 
Nice Install. I have same boat and thought long and hard about the trim tabs but decided against it because i use a kicker motor when trolling for Kokanne.
 
Wow, Nice job, I would like to see your switch mounting location. Well I am installing mine today. Came inside to cool off a while. So far I got the tabs installed. Going back out in a while to start switch and wiring install. Man Triumph leaves you no room on the dash to mount anything new (I have Dual Console) so I am going to mount the switch just behind the throttle handle on the gunwale. There is a plate there with the throttle and speaker mounted and has a large empty space that should do fine for the switch. Wish me luck.
Roger
 
Hey Fireman, how did your trim tab installation go? Did they make any significant improvement in the boat? Triumph does not list them as an option on the 195/191's. I have been told that this is because the hull is curved on the transom so the tabs don't extend straight back, but stick out to the sides and do not to work well like that. I would like to know what you think as someone who has done it. I would also love to see pictures. Thanks for any advice and insight.

Allied

I did get them installed and finally got to go out a few times to try them out. They are very responsive and sensitive. It takes some getting used to and I use them sparingly. When you adjust them a lil bit goes a long way. I click once and wait a few seconds before adjusting more. At first I did big adjustments and turned the boat up on its left side. Wife gave me a nasty look so I killed the throttle and started over. After some practice I find them to be real nice to adjust level and Bow raise. Planes faster too! Here are a couple of picks. I put the switch just behind my throttle control. The installation was slow for me because I didnt want to rush it and mess up the job. Not a hard install but time wise it took me about 4 hrs. total. Do this in the shade for gosh sakes! LOL
 

Attachments

  • Trim Tabs - Triumph 009re.jpg
    Trim Tabs - Triumph 009re.jpg
    169.1 KB · Views: 92
  • Trim Tabs - Triumph 005re.jpg
    Trim Tabs - Triumph 005re.jpg
    190.6 KB · Views: 98
  • Trim Tabs - Triumph 008re.jpg
    Trim Tabs - Triumph 008re.jpg
    167.1 KB · Views: 89
You sure do nice work. Guess thats why it took 4 hours. Like you, I'd rather go slow and do a good job that I can be proud off.
 
Thanks guys. I think the hardest part was running the electrical. I figure I am going to have this boat a long long time so I may as well do it right and make it look good. :D
 
Back
Top